Add Row
UPDATE
Add Element
Add Element
  • Home
  • Categories
    • Seasonal Yard & Property Care
    • Tools, Equipment & Product Insights
    • DIY Projects & How-To Guides
    • Pro Services & Local Highlights
    • Industry News & Trends
    • Sustainable Landscaping & Outdoor Living
October 14.2025
3 Minutes Read

Discover the Best Pumpkin Varieties for Carving This Halloween

Variety of carved pumpkins in a park setting, best pumpkin varieties for carving.

Embrace Fall with the Best Pumpkin Varieties for Carving

As the crisp air of October settles in, it’s time to embrace the comforting traditions of fall, one of which is carving pumpkins. Finding the perfect pumpkin isn’t just a Halloween necessity; it’s an enjoyable family activity that cultivates creativity and celebrates the season. Whether you're a novice grower or an experienced gardener, knowing which pumpkin varieties work best can enhance your experience. Here’s a guide to the best varieties for carving that can yield stunning jack-o’-lanterns while also being delicious for Thanksgiving feasts.

Why Pumpkins Matter

More than just decorations, pumpkins are versatile living resources. They can be used fresh and can also be canned or frozen, providing nutritional benefits and flavor well beyond Halloween. Their significance dates back to ancient Celtic traditions, and through time, they have become a staple in American culture, especially during autumnal celebrations.

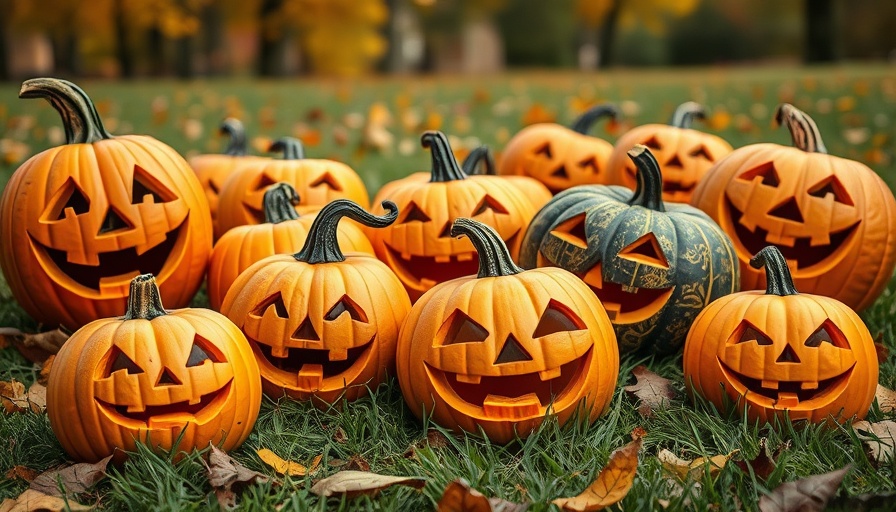
Top Pumpkin Varieties for Carving

When it comes to carving, specific pumpkin types rise to the occasion thanks to their size, shape, and sturdy skin. Here’s a closer look at some of the best choices:

1. Jack O’Lantern

The classic choice, the Jack O’Lantern (Cucurbita pepo), is known for its symmetrical, robust shape and smooth skin. Typically weighing between 10-18 pounds, this variety has been a favorite since 1956 and is designed for perfect carvings. With a growth time of about 105 days, it's accessible for many home gardeners.

2. Atlantic Giant

If size matters to you, then the renowned Atlantic Giant is the way to go. With weights that can exceed 200 pounds, this variety is perfect for bold decorating themes. Although they take about 120 days to mature, the sheer volume makes them a fun challenge and provides ample carving space.

3. Howden

Another popular option is the Howden pumpkin, designed specifically to serve the decorative needs of homes across America. With its classic carving shape and pliable skin, this variety enjoys a height of 10-15 feet, maturing in about 110 days.

4. Sugar Pie Pumpkin

Not all pumpkins need to be massive; the Sugar Pie Pumpkin is another excellent variety that strikes a balance between flavor and decor. At about 3-5 pounds, this variety features sweet flesh that is ideal for pies while still being compact enough for easy carving.

Creating a Thriving Pumpkin Patch

For those looking to cultivate their pumpkins, here are a few tips to start a backyard planting box or construct outdoor soil beds Muskegon:

  • Soil Quality: Ensure your soil drains well and is rich in nutrients. Pumpkins prefer a pH of 6.0-6.8.
  • Sunlight: Choose a location with full sunlight; pumpkins need at least 6-8 hours of sunlight daily.
  • Spacing: Allow for ample space between plants; ideally, each plant should have at least 50-75 square feet as they spread.

Waste Not, Want Not

Remember, after Halloween returns around every year, there's no need for your pumpkins to just become compost. Consider using pumpkin flesh in soups, pies, or roasted seeds, maximizing your garden’s bounty, keeping sustainability in mind as you design your backyard utility house Muskegon.

Embracing the Tradition with Unique Varieties

While traditional orange pumpkins are the most recognizable, don't shy away from exploring options like Baby Boo for a whimsical touch or the Blue Doll for something different. Mixing varietals can create a dynamic display on your porch or at community events.

Final Thoughts

Maintaining a garden not only cultivates delicious produce but also nurtures the spirit of tradition and craftsmanship during the fall season. With the right pumpkin varieties, homeowners can enjoy the delight of lighting up jack-o’-lanterns while celebrating the seasonal bounty.

Ready to get started? Explore local gardening centers for seedlings, and consider joining a community workshop to learn more about growing pumpkins and maximizing your outdoor spaces with elevated planter boxes Muskegon!

DIY Projects & How-To Guides

2 Views

0 Comments

Write A Comment

*
*
Related Posts All Posts
01.19.2026

Why You Should Prune Your Wisteria in January for Bountiful Blooms

Update Understanding the Importance of January Pruning Wisteria, known for its stunning blooms, requires careful pruning to maintain its beauty and structural integrity. January serves as a crucial time for winter pruning when the plant is dormant. This period allows gardeners to manage the plant's growth and promote abundant flower production. Without proper pruning, wisteria can quickly become a chaotic climber, potentially damaging nearby structures. Why Two Pruning Sessions Are Essential Timing pruning sessions is vital. Wisteria needs to be pruned twice a year: once in the summer and once in winter. Summer pruning, done in late July or August, manages excessive growth during the active season. This is essential for controlling size and promoting healthy flower production. On the other hand, winter pruning in January or early February focuses on refining the plant's shape, allowing for a clearer view of structural issues without the distraction of dense foliage. How to Prune Wisteria Effectively This January To prepare for a successful pruning sessions, ensure you have sharp shears and a lopper available. Before beginning, clean your tools to prevent disease spread. Here’s a step-by-step guide: Cut Back Shoots: Begin with side shoots that you previously pruned in summer. Aim to shorten these shoots to promote flowering. Remove Worn Out Growth: Identify and cut back any old, unproductive growth to invigorate the plant. Seek out brittle or unhealthy branches and prune them back to living wood. Trim Back Overgrowth: Address any branches that have grown excessively into unwanted areas. This will maintain the integrity of your garden space. Improve Shape: Periodically assess the overall appearance of your wisteria as you prune. Correct any structural issues and ensure a balanced, attractive shape. The Benefits of January Pruning Pruning wisteria in January maximizes the potential for flower production. The timing is ideal because it allows the pruner to make strategic cuts at a time when the plant's energy can be redirected towards flowering rather than vegetative growth. Facilitating airflow and sunlight penetration through proper pruning also improves the health of the plant while providing a stunning display in spring. Common Misconceptions About Wisteria Pruning Many gardeners may fear that pruning wisteria will harm their plants. In reality, regular pruning ensures that wisteria remains healthy and vibrant. Neglecting to prune can lead to an overly dense plant that produces fewer flowers and may even damage structures it climbs. Winter is an excellent time for cuts because the lack of leaves makes structural evaluation straightforward and effective. Connect with Local Gardening Opportunities If you’re inspired by the idea of cultivating your own backyard garden, now is the perfect time to explore various projects. Whether you’re looking to start a backyard planting box Muskegon or construct outdoor soil beds Muskegon, there are resources available to help you succeed. Pruning wisteria is just one aspect of maintaining a vibrant, flourishing garden. Incorporate elevated planter boxes or even build a composting barrel to enhance your gardening experience. To further enhance your outdoor space, consider embarking on DIY projects like a rustic gate or an arched plant support project. These can not only bolster your garden’s aesthetic but provide greater utility, making your home a more serene escape. Inspiring Quotes to Motivate Your Gardening Journey “To plant a garden is to believe in tomorrow.” — Audrey Hepburn. This sentiment resonates especially this time of year as you take proactive steps toward creating the garden of your dreams. As you prune your wisteria this January, remember that you’re not only shaping a beautiful plant but also cultivating an environment that brings joy and fulfillment. Why not start engaging in more yard projects today? Take your landscaping skills to the next level!

01.19.2026

How to Create an Affordable DIY Seed-Starting Station for Spring

Update Creating a Thriving Seed-Starting Station on a Budget For many gardening enthusiasts, the urge to grow their own plants starts with a simple desire to cultivate a garden filled with vegetables, herbs, and vibrant flowers. Setting up a DIY seed-starting station doesn't have to be expensive; with a bit of creativity and planning, you can create a productive growing environment for under $50. Whether you’re in Muskegon or beyond, embracing the art of seed starting this spring is an excellent way to ensure your plants are ready to thrive when the soil warms up. Here’s how you can set up a DIY station that fits your budget while maximizing your growing potential. Essential Components of Your Seed Starting Setup When establishing a seed starting station, it’s crucial to know what you need before you begin. The basic items include: Seed starting containers Seed starting mix or soil Seeds A light source A watering method These essentials can often be sourced from repurposed household items or through community connections. Many experienced gardeners recommend checking local nurseries for leftover pots or using everyday items like yogurt containers, egg cartons, and toilet paper rolls for seed starting. This resourcefulness not only reduces costs but is also a fulfilling aspect of DIY gardening. Control the Environment Beyond the basics, controlling the environment for your seedlings is vital for success. This can include: Grow lights A heat mat Seed starting trays A simple shelf with lights overhead can provide ample brightness, ensuring healthy, robust seedlings. In the Muskegon area, where sunlight may sometimes be limited, grow lights become essential, especially during the cooler months. Mixing Your Own Seed Starting Soil The mix you use plays a significant role in seed germination. Here’s a simple recipe for a homemade seed starting mix that you can create using ingredients you may already have: ⅓ moisture-retention materials like coir or peat moss ⅓ drainage components such as perlite or pumice ⅓ fertility enhancers like compost This homemade mix not only saves you money but also ensures that you know precisely what your seedlings are growing in, making for a healthier start. Beyond Containers: Innovative Seed Starting Techniques Consider alternative methods to traditional seed starters—techniques that utilize readily available tools. For example: Egg Cartons: These can be used as biodegradable seed trays, perfect for starting your seeds. Each compartment holds individual seedlings until it’s time to transplant. Plastic Containers: Old yogurt cups or takeout containers are brilliant for this task; just make sure to poke drainage holes at the bottom. Newspaper Pots: Roll newspaper strips into small pots that can be planted directly into the soil. These methods are not only budget-friendly but also promote sustainability by repurposing materials that would otherwise be discarded. Watering Wisely Effective watering does not require any expensive equipment. A simple spray bottle, or even a milk container with holes punched in the lid, will work well. Water gently to avoid disturbing the delicate seedlings. Getting the Most Out of Your Seeds To reduce expenses even further, consider collaborating with fellow gardeners in Muskegon for seed swapping. This community approach to gardening not only saves money but also fosters relationships within the gardening community. Additionally, make sure to label your seedlings clearly. Effective identification will help you manage your garden better as it matures, thus minimizing confusion come transplant time. Reusing old plastic containers or popsicle sticks can create excellent markers. Final Thoughts: Sowing Seeds for Success Creating a DIY seed starting station for under $50 is not just achievable; it can be a fun and rewarding process that fosters a love for gardening. By using creativity to repurpose household items, save costs, and involve community resources, you can enhance your gardening experience while still having a positive environmental impact. Embrace this opportunity to connect with nature and embark on your gardening journey! For those looking to ramp up their outdoor projects further, explore innovative ways to start a backyard planting box Muskegon or even construct outdoor soil beds Muskegon for your spring endeavors. Happy gardening!

01.19.2026

When is the Right Time to Move Your Tomato Seedlings into Larger Pots?

Update Understanding Transplant Timing for Tomato Seedlings Transplanting tomato seedlings at the right time is crucial for fostering a robust root system that propels healthy growth. Recognizing when your seedlings are ready to graduate to larger pots is key: typically, seedlings should be around four inches tall with two sets of true leaves. A common misconception is that the initial cotyledons, or seed leaves, count as true leaves; however, they're merely a precursor to the more recognizable tomato foliage. The Significance of Pot Sizes Choosing the correct pot size is vital. While five-inch pots are ideal for early-stage tomato seedlings, be mindful of avoiding overly large containers that can lead to overwatering. Seedlings require containers that allow them to firmly establish roots while ensuring adequate drainage. Undoubtedly, drainage holes are a must to prevent waterlogging, which can be detrimental to young plants. As such, selecting individual pots over shared containers also heightens the chance of successful growth due to optimized air circulation. Crafting the Right Soil Mix Your seedlings thrive best when not planted in the same seed starting mix used for germination. Instead, aim for a nutrient-rich potting mix that can support tomato seedlings through their initial growth stages. An effective concoction might include a blend of 60% potting soil, 20% compost, and 20% perlite. This mixture maintains both the oxygen necessary for root health and the moisture required for nutrient absorption, setting the foundation for a flourishing plant. Common Pitfalls in Transplanting While the initial excitement of transplanting can lead to hasty decisions, several missteps can impede your seedlings’ progress. Avoid waiting too long to transplant, as the roots can become rootbound, stunting growth. Similarly, it's crucial not to overwater your seedlings immediately following transplant to prevent root rot. Instead, opt for bottom watering after the initial settlement period; this reinvigorates the potting mix and encourages roots to reach deeper for moisture. Practical Tips for Successful Transplanting Harden Off Your Seedlings: Before you shift seedlings outdoors, ensure they're acclimated by hardening them off. Gradually expose them to sunlight and outdoor conditions. Use Quality Containers: If you lack nursery pots, consider reusing plastic cups with drainage holes to keep your seedlings happy. Observe and Adjust: Continue to monitor your plants for signs of stress or overexposure to sunlight, making adjustments as needed to ensure a smooth transition. Add Support: As your tomato plants grow, integrate support structures to avoid damage. This helps prevent leggy growth and encourages fruitful production. Conclusion: Enhance Your Growing Experience By paying close attention to the timing of when to move your tomato seedlings into larger pots and how to effectively handle them during the transplanting process, you set yourself up for a successful gardening experience. Each step, from selecting the appropriate pot to using the right soil mix, is integral to the health and vitality of your plants. Ready to expand your gardening efforts? Whether you're interested in starting a backyard planting box in Muskegon or exploring advanced gardening techniques, we encourage you to delve deeper into the realms of outdoor planting and nurturing vibrant, thriving gardens that can be enjoyed throughout the seasons.

Terms of Service

Privacy Policy

Core Modal Title

Sorry, no results found

You Might Find These Articles Interesting

T
Please Check Your Email
We Will Be Following Up Shortly
*
*
*