Add Row
UPDATE
Add Element
Add Element
  • Home
  • Categories
    • Seasonal Yard & Property Care
    • Tools, Equipment & Product Insights
    • DIY Projects & How-To Guides
    • Pro Services & Local Highlights
    • Industry News & Trends
    • Sustainable Landscaping & Outdoor Living
August 11.2025
2 Minutes Read

Harness Hot and Humid Conditions: Essential Tips for Tomato Growth Success

Grow-at-home success tips Muskegon: thriving tomato vine in garden.

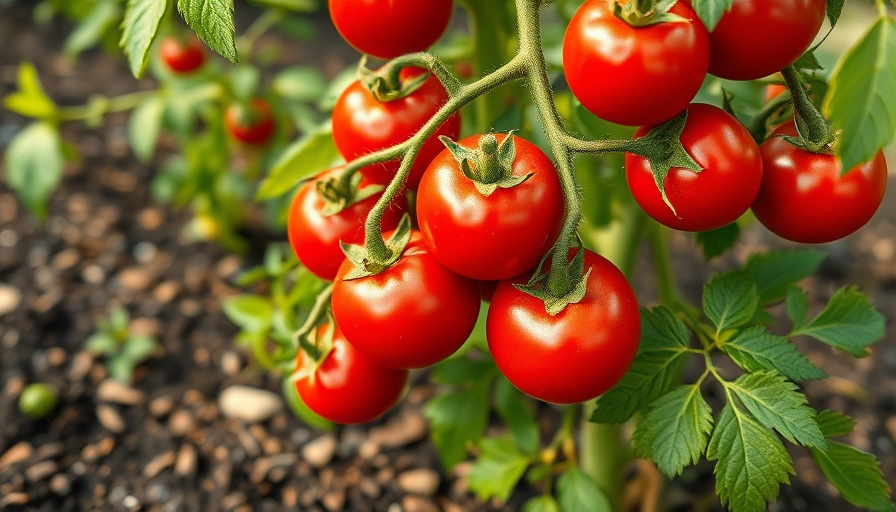
Mastering Tomato Growth in Humid Climates: Essential Strategies

Growing tomatoes is one of summer’s most rewarding pursuits. However, for gardeners in hot and humid climates, cultivating these juicy fruits presents unique challenges. With temperatures often soaring above 85°F (29°C) and accompanying humidity, tomatoes face increased risks of disease and issues with fruit set.

While we cannot change the weather, we can adopt effective strategies to promote healthy tomato growth even during the muggiest months. Below are essential tips for success.

Get Started Early: Timing is Key

One of the best strategies for avoiding the stress of heat on your tomatoes is to plant them early in the season. By starting your tomato plants in early spring, you can avoid the intense heat that may cause blossom drop. Aim to transplant them outdoors after the last frost, ideally by early May. If cooler nights are predicted, protect young plants with row covers to secure their development.

If the summer heat becomes relentless, consider sowing a second round of tomatoes in late July. These later plantings may initially face higher temperatures, but they will begin to flower and produce fruit as cooler weather approaches, allowing for a fresh crop free from the diseases that often affect earlier seedlings.

Trellising: Elevate for Health

A key technique to ensure your tomatoes thrive in humid conditions is proper trellising. By elevating your plants, you improve air circulation, which is crucial for reducing moisture that can lead to fungal diseases. This technique also makes it easier to harvest ripe tomatoes without damaging the plants.

Water Wisely: Timing and Techniques

Watering is another essential component of successful tomato growing. It’s best to water plants deeply in the early morning to ensure moisture reaches the root zones without encouraging evaporation. Try using homemade watering devices or slow drip plant watering techniques to ensure consistent moisture levels without waterlogging the soil.

Choosing the Right Varieties: Adaptation Matters

Selecting tomato varieties that are well-suited for hot and humid climates can make a significant difference. Opt for disease-resistant varieties like 'Cherokee Purple' or 'San Marzano' which can better withstand the rigors of challenging weather. These varieties not only thrive but will deliver amazing flavors, ensuring your garden is the highlight of the cooking season.

Implementing Good Practices: Keep Disease at Bay

To minimize disease risks, maintain good gardening practices such as proper spacing and removing any dead leaves to improve airflow around your tomato plants. Additionally, consider incorporating beneficial insects or using organic sprays to help combat any pest issues.

By staying proactive and choosing the right strategies for your local conditions, you can enjoy a bountiful tomato harvest, regardless of the heat and humidity!

Ready to create your ideal garden? Contact Norther-LawnCare.com for top-notch lawn care and property management solutions. Call Everett Lucas at 231-450-3414 for a five-star service experience!

DIY Projects & How-To Guides

Write A Comment

*
*
Related Posts All Posts
08.13.2025

Discover 11 Essential Shrubs to Uplift Your New Home Landscape

Update Transform Your New Home with 11 Must-Have Shrubs Landscaping a new home is an exciting journey, offering a chance to create a welcoming atmosphere for both you and your guests. As you envision how your outdoor space will look, it’s crucial to consider how shrubs can play a foundational role in your garden. Whether you’re a seasoned gardener or just starting, choosing the right shrubs can elevate your landscape design, creating beauty, privacy, and interest throughout the seasons. Why Shrubs Matter in Home Landscaping When designing your exterior, shrubs are often the backbone of your landscape. They can be used to define spaces, add color, and create structure in your garden. With countless options available, it can be overwhelming to choose which shrubs to include. Selecting the right varieties based on your local climate and soil conditions can provide a sustainable and functional foundation for your landscape. 1. Hydrangea: The Versatile Statement Piece Hydrangeas are beloved for their large blooms and lush foliage. Perfect for creating living hedges, they thrive in zones 3-9 and prefer partial shade, especially during hot summers. These shrubs enjoy moist, slightly acidic soil, making them an excellent choice for those looking to add color and texture to their foundation planting. 2. Juniper: A Hardy Ground Cover Often recognized for their hardy nature, junipers are great for homeowners looking to cover ground or create low-maintenance landscaping. With varieties that show off beautiful blue green foliage, these shrubs can thrive in various conditions while providing year-round interest. 3. Boxwood: A Classic Choice Boxwoods are a time-honored favorite in landscaping. Their dense, evergreen foliage allows them to be pruned into unique shapes, adding structure to your design. They do well in full sun to partial shade and are suitable for zones 5-9. The Importance of Local Climate in Shrub Selection Understanding your local climate is essential for choosing the right shrubs. For example, if you're in Muskegon, Michigan, factors like winter hardiness and summer heat can influence which varieties will thrive. Ensure you account for your specific hardiness zone, moisture levels, and soil composition when selecting shrubs for your landscape. 4. Future Landscaping Trends: Sustainability and Native Plants As more homeowners aim for sustainable gardening practices, native plants are becoming increasingly popular. These shrubs are adapted to local conditions, resilient to pests, and typically require less maintenance. Incorporating native shrubs into your landscape design not only promotes biodiversity but can also attract local wildlife. 5. Practical Tips for Designing Your Space When planning your layout, consider the purpose of your garden. Do you want to create a space for entertaining, a children's play area, or simply a lush retreat? Any design should factor in the natural light each area receives throughout the day. Additionally, mix various heights and bloom times among your shrub selections to ensure year-round visual interest. This can include using ground covers like junipers alongside prominent features like hydrangeas. 6. Emotional and Human Interest: The Impact of Landscaping Landscaping isn’t just about aesthetics; it can profoundly impact your well-being. A thoughtfully designed garden can create a sense of peace and connection to nature, fostering relaxation and enjoyment in your outdoor spaces. As you choose your shrubs, think about how you want your landscape to resonate with your lifestyle and activities. Final Considerations for Your Landscape As you embark on this rewarding journey of landscaping your new home, remember to keep practicality and aesthetics in mind. The shrubs you select can enhance your landscape significantly, creating a beautiful environment to enjoy with family and friends. For the ultimate success in your gardening endeavors, consider reaching out to local experts or lawn care professionals. For residents in Muskegon, your local lawn care, winter plowing, and property management company, Norther-LawnCare, can assist with maintaining your new landscape. Call Everett Lucas at 231-450-3414 to get started on a thriving outdoor space!

08.13.2025

Start a Backyard Planting Box: How to Divide Summer Phlox Effectively

Update Why Dividing Summer Phlox is Essential for Your Garden If you're looking to rejuvenate your garden and ensure that your summer phlox blooms beautifully, understanding the importance of dividing these perennial plants is key. Over time, phlox plants can become less vigorous and show diminished flowering due to crowding, limited airflow, and nutrient competition. Therefore, by regularly dividing phlox every two to four years, you promote healthier growth and maximize their bright, starry displays. Getting the Timing Right When it comes to dividing summer phlox, timing is crucial. Early fall and spring are the optimal seasons for this task. Spring division allows you to take advantage of the active growing season, while dividing in early fall offers the roots a chance to establish before winter's frost. Remember, dividing during hot or extreme cold conditions can stress both the new divisions and the mature plants, leading to poor establishment. The Tools You’ll Need Successful division starts with proper tools. A digging fork or spade is essential for lifting the clump of phlox, while clean, sharp pruners will help you divide the crown into manageable sections. Don’t forget to disinfect your tools to prevent the spread of disease; an alcohol wipe can serve this purpose well. Preparing for Division Before diving into division, it's wise to prep the plant. As the garden matures, conditions around the original planting can change, necessitating a fresh approach. Begin by deadheading faded blooms and removing any weak or diseased stems to help prevent the spread of powdery mildew. These preparations ensure that your phlox enjoys a healthy life post-division. Step-by-Step Guide to Division Prepare the transplant area: Before you begin, make sure soil conditions are suitable for phlox, with a good mix of organic matter to boost richness. Lift the clump: Use your spade or fork to gently lift the clump from the ground. Divide the crown: Carefully separate the clump into sections with two to three stems each. Ensure that the roots remain intact. Replant: Choose a sunny spot with well-draining soil to ensure your new divisions flourish. Water appropriately: Newly divided phlox need ample moisture to take root in their new homes. Additional Benefits of Dividing Phlox Not only does dividing phlox promote better blooming and health, but it also allows homeowners to expand their gardens. Each division can turn into a new plant, thus enriching the visual appeal of your yard and potentially increasing property value. Moreover, if you're interested in sustainable gardening, utilizing divisions to create new plants is a fantastic way to practice eco-friendly gardening techniques. Conclusion: Transform Your Garden with Phlox Divisions With just a few steps—right timing, the right tools, and proper technique—you can revitalize your summer phlox, keeping your garden vibrant and healthy. For the best results this season, consider utilizing the expertise of professional interest in local lawn care. For comprehensive lawn and property management solutions, be sure to contact Norther-LawnCare.com and reach out to Everett Lucas at 231-450-3414.

08.13.2025

Avoid These 5 Common Rose Pruning Mistakes to Keep Your Bushes Thriving

Update Common Rose Pruning Mistakes and How to Avoid Them Pruning roses can feel like a daunting task for any DIY gardener—especially if you've made mistakes in the past. One wrong cut can set back your roses for a season or even kill them. Understanding what you shouldn't do when pruning is fundamental to successfully nurturing these beautiful plants. Here are common mistakes that can damage your prized roses and tips on how to avoid them. The Importance of Sharp Tools The first rule of thumb in rose pruning is to always use sharp tools. Dull pruning shears do more harm than good. They crush the plant tissue instead of making clean cuts, which not only prolongs the healing time but also makes your plants vulnerable to diseases. This can lead to yellowing leaves, dying canes, and ultimately a sickly plant. Before each pruning session, test your tools to ensure they are sharp. Investing in high-quality shears and maintaining them will lead to healthier plants and, consequently, a more vibrant garden. The Dangers of Using Dirty Tools Even the sharpest tools can introduce disease to your roses if they are dirty. Pruning shears can carry fungal spores or bacteria from one plant to another, turning an act of care into a disaster. Make it a habit to wipe your tools with a disinfectant before using them on your roses, especially after pruning diseased plants. Over-Pruning: A Common Pitfall One of the biggest mistakes gardeners make is over-pruning their roses. It’s crucial to know not just how much to cut, but when to stop. Cutting back too much can cause the plant to struggle to produce new growth in the upcoming season. If you’re uncertain, prune conservatively and observe how your plants respond. Every rose variety is different, so look up specific care instructions for the type of roses you own. Timing Is Everything in Rose Pruning Timing is a critical factor in maintaining the health of your roses. Many gardeners prune at the wrong time, which can weaken the plants or impede their growth. Ideally, you want to prune your roses in late winter or early spring, just as the buds begin to swell. This is when the plants are most prepared to heal from your cuts and start the blooming process. The Right Techniques Matter Using incorrect pruning techniques can lead to irreversible damage. Always cut at a 45-degree angle just above a bud to promote growth in that direction. Making cuts too close to the bud can result in dead tissue, while leaving too much stem can impede new growth. If you’re new to pruning, consider watching some instructional videos or consulting detailed guides to refine your technique. Understanding Your Plant’s Needs Each rose variety has its own unique requirements when it comes to pruning. Understanding whether your roses are climbers, shrubs, or hybrid tea roses will help you tailor your approach. Spend time researching your specific variety to determine the best practices to ensure vibrant, healthy blooms in your garden. Conclusion: Create a Flourishing Space When it comes to pruning roses, knowledge is power. By avoiding these common mistakes and arming yourself with the right tools and techniques, you can create a flourishing rose garden. Crafting a beautiful garden doesn't only involve knowing how to plant; it requires a keen understanding of how to care for what you have. If you're looking to take your gardening to the next level, consider adding raised beds or other outdoor projects to enhance your space. For tailored assistance in your DIY yard projects, reach out to your local lawn care experts at Norther-LawnCare.com, where you can get the help you need for successful gardening.

Terms of Service

Privacy Policy

Core Modal Title

Sorry, no results found

You Might Find These Articles Interesting

T
Please Check Your Email
We Will Be Following Up Shortly
*
*
*