Add Row
UPDATE
Add Element
Add Element
  • Home
  • Categories
    • Seasonal Yard & Property Care
    • Tools, Equipment & Product Insights
    • DIY Projects & How-To Guides
    • Pro Services & Local Highlights
    • Industry News & Trends
    • Sustainable Landscaping & Outdoor Living
October 10.2025
3 Minutes Read

Transform Your Garden: Discover Vibrant Bulb Combinations to Plant in October

Colorful bulb combinations to plant in October garden.

Plant a Colorful Spring Border with these Bulb Combinations

As the leaves turn and fall settles in, it’s time for passionate gardeners to think ahead for a vibrant spring. October is the perfect month to plant spring bulbs, ensuring that your garden bursts with life after winter’s grasp. Expert insights from Melissa Strauss and additional tips from fellow horticulturists offer a treasure trove of ideas for creating notable spring borders that will leave your neighbors in awe.

Why October is the Ideal Time for Bulb Planting

Spring bulbs demand a period of cold stratification (or vernalization), which is why fall planting is recommended. This exposure enables bulbs to establish robust root systems necessary for vibrant blooming in spring. October typically falls within the safe planting zone, escaping the harshest of frosts. However, gardeners in colder climates should consider their local conditions to ensure a successful planting experience.

Choosing the Right Combinations for Impact

Creating visual interest is key when selecting bulb combinations. When layering different heights, colors, and blooming times, you can maximize your garden's aesthetic and ecological potential. For instance, pairing yellow daffodils and purple muscari can create a beautiful layered carpet. Daffodils rise to about 12 inches, while muscari remain beneath at 6 inches, making for an eye-catching visual from spring to summer.

Suggested Bulb Combinations

Consider these intriguing pairings for your spring garden:

  • Dark Tulips and White Daffodils: Stagger the timing of tulips to extend the bloom period for a sophisticated display.
  • Pink and Purple Hyacinths: These mid-season bloomers add elegance with their delightful fragrance and vibrant colors.
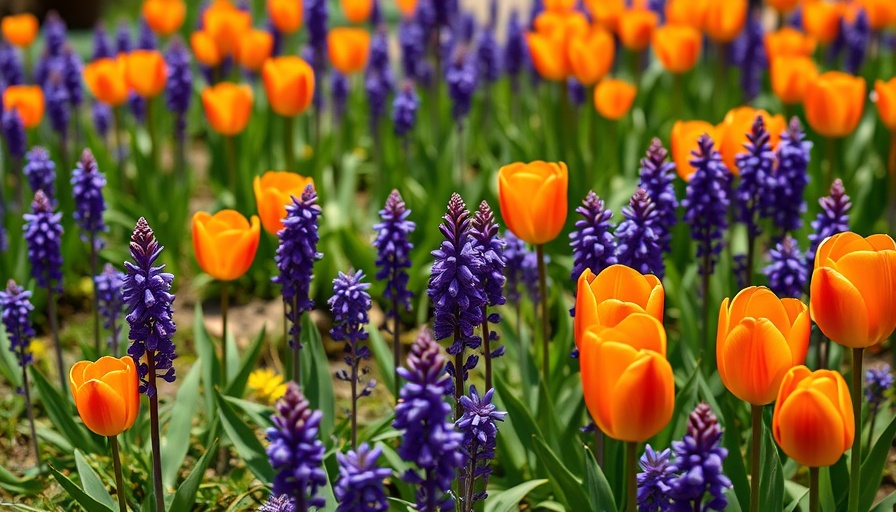
  • Orange Tulips, Lavender Hyacinths, and White Daffodils: This classic trio offers a beautiful color palette and each type blooms in succession for increased seasonal interest.
  • Blue and Yellow Irises: Bearded irises provide a whimsical touch with their showy colors and unique textures, enhancing the meadow-like feel in your spring garden.
  • Blue Camassia and White Daffodils: A striking combination where camassias bloom after daffodils, allowing for an extended flower show.

Designing for Height and Layering

When planning your garden beds, remember that height plays a significant role in the overall composition. Daffodils can serve as a structural backbone, allowing shorter plants, such as muscari and hyacinths, to fill in the gaps. This layering technique keeps your garden visually appealing year-round, even when certain plants die back after flowering.

Practical Tips for Successful Planting

  • Soil and Drainage: Ensure you plant in well-drained soil. Bulbs do not thrive in soggy conditions, which can lead to rot.
  • Spacing: Aim to plant bulbs according to their height—tallest bulbs in the back, shorter in the front—to create a natural, cascading effect.
  • Color Harmony: Consider complementary colors for vibrancy. Pair warm tones like orange and red with cooler shades such as blue and purple for a balanced look.

Conclusion: Revitalize Your Backyard This Fall

As you prepare for spring by planting your bulbs this October, consider starting a backyard planting box or constructing outdoor soil beds to facilitate your garden dreams. Each layer, each color, and every bloom contributes to the beauty your space can offer. Now is the time to transform your yard into a colorful tapestry of life. Don’t wait—make this October the turning point for your springtime wonderland! For more DIY gardening tips or to explore personalized projects like building elevated planter boxes, keep an eye on local resources!

DIY Projects & How-To Guides

Write A Comment

*
*
Related Posts All Posts
11.05.2025

Master Grass Seed Growth: Your Guide to Germination Times and Tips

Update Understanding Grass Seed Germination: Timelines and Types For homeowners eager to cultivate vibrant lawns, understanding how long grass seed takes to grow is essential. Typically, germination occurs between 3 to 30 days, influenced by factors including grass type, climate, and soil conditions. This diving into the germination timelines of both warm- and cool-season grasses can establish the groundwork for a lush landscape. Exploring Grass Types: Germination Rates Different species of grass germinate at varying rates. For instance, perennial ryegrass shines as the fastest, germinating in as little as 3 days, making it a popular choice for quick patches and overseeding. On the other hand, varieties like Bahia and bluegrass may take up to 30 days to sprout, extending your wait for that green cover. Here's a quick rundown of the germination times for common grass types: Bahiagrass: 14 to 30 days Bermudagrass: 10 to 30 days Kentucky bluegrass: 14 to 30 days Centipedegrass: 10 to 21 days Perennial ryegrass: 3 to 10 days Understanding these rates helps in planning the optimal time for grass planting, depending on the type most suitable for your local climate. Key Factors Affecting Grass Seed Growth Besides the grass type, several critical factors influence the germination of your seeds: Moisture: Soil hydration is crucial. Grass seeds require consistent moisture to activate germination processes. Make sure to water adequately without creating puddles. Temperature: Different seed types prefer different temperature ranges. For example, cool-season grasses germinate best between 60°F and 75°F, while warm-season types thrive in higher temperatures. Soil Quality: The soil should be nutrient-rich and well-aerated. Compacted soil lacks the oxygen essential for seedling growth. Light: Different seeds have differing light requirements. For instance, some grass types must be sown at specific depths to reach adequate light levels during germination. Making adjustments to these variables can promote faster sprouting and a healthier lawn overall. Tips for Accelerating Grass Seed Germination Homeowners can employ several strategies to help jumpstart grass seed growth: Pre-Germination Techniques Before planting, consider priming your grass seeds. Soaking seeds in water for a few days can start the germination process, as moisture helps break down seed coats. Another effective method involves wrapping seeds in a damp paper towel and placing them in a warm area, aiding germination by mimicking ideal conditions. Choosing the Right Time and Location Timing does matter! Planting cool-season grasses in the fall when temperatures are dropping or warm-season grasses in spring when temperatures rise can lead to better outcomes. Furthermore, selecting the right area and ensuring it matches the sunlight needs of specific grass types can enhance growth. Investing in Quality Seeds Not all seeds are equal. Look for high-quality grass seed that guarantees a germination rate of 90%-95%. Investing in reputable brands ensures better survival of your plants and a more vibrant lawn. Common Misconceptions about Grass Seed Growth There are plenty of myths about grass planting that can mislead gardeners. For instance, many believe that all grass grows at the same rate or that they can water their seeds excessively to speed growth. Understanding the distinct needs of each grass type is essential for successful lawn cultivation and maintenance. Call to Action: Start Your Lawn Journey Today! With the right knowledge about grass seed germination, homeowners can embark on a rewarding lawn care journey. Whether you’re preparing for a new lawn or simply sprucing up your existing space, these tips can ensure success. Don't hesitate to consult with landscaping professionals to get tailored advice for your specific needs, ensuring the best possible start for your new grass!

10.31.2025

Comprehensive Guide on How to Repair Mole Damage in Your Yard

Update Understanding Mole Damage in Your Yard Moles may be small, but they can create significant turmoil beneath the surface of your yard. Their unique burrowing habits allow them to excavate around 100 feet of tunnels each day, leading many homeowners to believe that they have an infestation when it might just be one creature at work. Recognizing the signs early can help mitigate further damage. Signs of mole activity typically include raised ridges, soft soil, molehills, and patches of dead grass. How to Assess the Damage Correctly Before acting, assess the extent of the damage to understand how best to repair it. Look for signs of mole activity such as: Raised soil ridges that indicate tunneling Molehills, which are small mounds of dirt Soft and spongy soil caused by hollow tunnels below Patches of dead grass where roots may have been disturbed Once you've identified the signs, it’s essential to act quickly. A delayed response may mean increased damage as moles continue to burrow. Step-by-Step Repair Process Here are the effective steps to repair the damage: 1. Press Down the Raised Tunnels Using a shovel, gently press down any raised soil ridges. This should be done right after you spot them for minimal damage to your grass. The key here is to ensure that the grass stays healthy and does not dry out. 2. Rake Down Mole Mounds Carefully rake down molehills to flatten them back into the yard. If they’re still fresh, the grass underneath should not be harmed significantly. 3. Water the Flattened Areas After flattening the mounds and tunnels, give the areas a good watering. This helps compact the soil and sets the stage for new growth. 4. Overseed or Lay Sod If you have patches of dead grass, consider overseeding those areas. First, remove any dead grass and debris, then lightly aerate the soil before applying seeds. In severe cases where large areas are affected, laying sod may be a better option. Consider consulting local lawn care professionals, especially if you require extensive repairs. 5. Add Fertilizer or Compost Enhance recovery by applying a nitrogen-rich fertilizer or compost to encourage growth. It's crucial to keep the soil moist but not drenched, facilitating better seed germination. 6. Maintain the Lawn Water newly seeded areas lightly but frequently, especially as they begin to germinate. Monitor for signs of growth and resume regular maintenance once the grass reaches a height comparable to your existing lawn. Preventing Future Mole Damage While it’s essential to address existing damage, prevention is key to dealing with future mole problems. Here are some tips: Maintain a healthy lawn: A robust lawn will make it less appealing for moles. Adjust irrigation levels: Overwatering can attract earthworms, a primary food source for moles. Consider slightly reducing your lawn's water supply. Use natural repellents like castor oil around identified activity areas, which can deter moles from staying in your yard. Seeking Professional Help Sometimes, despite our best efforts, the damage may be too extensive for a DIY approach. Seeking professional assistance can ensure your lawn gets the care it needs and may include services for aeration, overseeding, and pest control. If you’re unsure of how to handle the situation alone, consider reaching out to experienced lawn care companies. Final Thoughts Ensuring your lawn remains beautiful and healthy is a significant commitment. By understanding how to diagnose and repair mole damage efficiently, you can help maintain your property’s appearance and functionality. However, don't hesitate to seek help when needed. A little investment in professional services can result in a remarkably healthier lawn. Need a professional touch to your lawn care? Consider booking a pro service to help restore your yard after mole damage and give it a fresh start!

10.30.2025

Transform Your Yard: Winter Landscaping Ideas for a Vibrant Space

Update Transforming Your Yard into a Winter Wonderland Winter often evokes images of barren landscapes, stripped of their summer hues. But did you know winter can also be a canvas for creativity and beauty in your garden? As the cold sets in, homeowners have an opportunity to design captivating landscapes that shine even in frost's embrace. Here are innovative strategies and engaging landscaping ideas to ensure your yard remains a charming sight this winter. 1. Embrace the Evergreen Beauty Evergreen plants are the stalwarts of winter landscapes, keeping your yard alive with color when most plants lie dormant. While planting, consider a diverse arrangement of evergreens, incorporating various heights and textures. Standing tall, conifers such as pines and spruces provide a striking backdrop, while mid-sized shrubs like yews and hollies fill in the space below. Ground covers such as creeping junipers can finish off the look neatly. Layering is key—it brings depth and dimension to your wintry canvas, making your yard resemble a naturally sculpted forest edge. This winter strategy also offers refuge to local wildlife, adding life to your landscape. 2. Delight in Winter-Blooming Plants When it comes to color, winter doesn't need to be dull! One of the most delightful surprises of the season is the range of winter-blooming plants that can add vibrant spots of color. Witch hazel, with its fragrant spidery flowers from October to March, brightens gray days. Hellebores, often referred to as Christmas roses, push through the snow, offering creamy blooms when most other flowers are subdued. Even the resilient camellias and winter daphne invite hints of summer into the winter chill with their captivating blooms and fragrances—an aromatic reminder of warmer days. 3. Textural Interest with Seed Heads Many homeowners typically cut back their gardens in fall, but consider taking a different approach: leave the seed heads and dried flowers standing. This practice creates natural sculptures that offer visual interest throughout winter. Ornamental grasses, particularly varieties like 'Karl Foerster,' can be stunning with their feathery seed heads highlighted by a dusting of snow. These dried plants not only beautify your garden but also help sustain overwintering birds, creating a delicate interaction between nature and your landscape. 4. Create Striking Hardscape Elements In winter, hardscape features become essential, as they add structure and aesthetics to landscapes devoid of foliage. Think pathways, flagstone patios, and sturdy benches that invite respite amidst the chill. Not only do these enhancements increase functionality, but they also allow you to enjoy outdoor spaces throughout winter. Consider incorporating unique materials like slate or river rock, which can add character and charm to your yard. 5. Utilize Lighting for Enchantment Winter afternoons end early, but that doesn’t mean your landscape has to vanish into shadows! Outdoor lighting can dramatically transform your winter garden. Installing uplights can highlight the textured bark of trees, while strings of fairy lights create a whimsical atmosphere. Pathway lights ensure safety while enhancing visibility among the ethereal beauty of a snow-laden landscape. Illumination brings magic to the nighttime scene, making your outdoor space inviting even in the frosty months. 6. Highlight the Beauty of Colorful Containers Container gardening extends beyond the growing season and can be a creative way to maintain color through winter. Choose pots with hardy plants like pansies, ornamental cabbage, or even cold-resistant succulents. Arranging these containers near entries or along pathways invites intrigue and adds charm to your garden. Mixing textures and colors from decorative elements like pine cones or twigs can draw the eye and make each container a focal point. 7. Refresh Your Garden Beds with Colorful Mulch You might not think of mulch as a winter element, but adding colorful mulch—be it red, gold, or black—can infuse vibrancy into the monotone landscapes typical of this season. Mulch serves a vital role beyond aesthetics: it helps insulate plant roots against freezing temperatures while retaining moisture, ensuring your landscape stays healthy. 8. Consider the Gradual Garden Approach If you're contemplating changes for spring, winter is an ideal time to plan your garden’s evolution. By considering the gradual approach, you'll not only stay ahead of spring preparations but also have the chance to envision how transitions will play out seasonally. Early discussions with local landscape professionals can help you identify the perfect timing for your projects, ensuring that everything is in place once the thaw begins. 9. Address Snow Management For those in areas with significant snowfall, planning snow management is crucial to protect your landscaping investments. Create designated snow storage areas, and keep driveways and walkways cleared to protect plants against heavy accumulation. Proper snow management not only safeguards your plants but also enhances the visual appeal of your winter landscape. 10. Actionable Insights for a Beautiful Winter Winter landscaping is not a daunting task, but rather an exciting challenge that offers unique opportunities. By embracing evergreens, incorporating eye-catching blooms, and infusing color with container gardens or mulch, homeowners can create a stunning winter landscape. The key is thinking outside the box and using this quiet season to prepare for vibrant changes ahead. Don’t forget to highlight interactions with nature that can enrich your garden sense, both visually and ecologically.

Terms of Service

Privacy Policy

Core Modal Title

Sorry, no results found

You Might Find These Articles Interesting

T
Please Check Your Email
We Will Be Following Up Shortly
*
*
*